Creative Tools
From Text to Hollywood: A Beginner’s Guide to Creating Cinematic Video with Runway.
Turn text and images into short cinematic clips with step-by-step prompts, camera control, and built-in editing.
From Text to Hollywood: A Beginner’s Guide to Creating Cinematic Video with Runway.
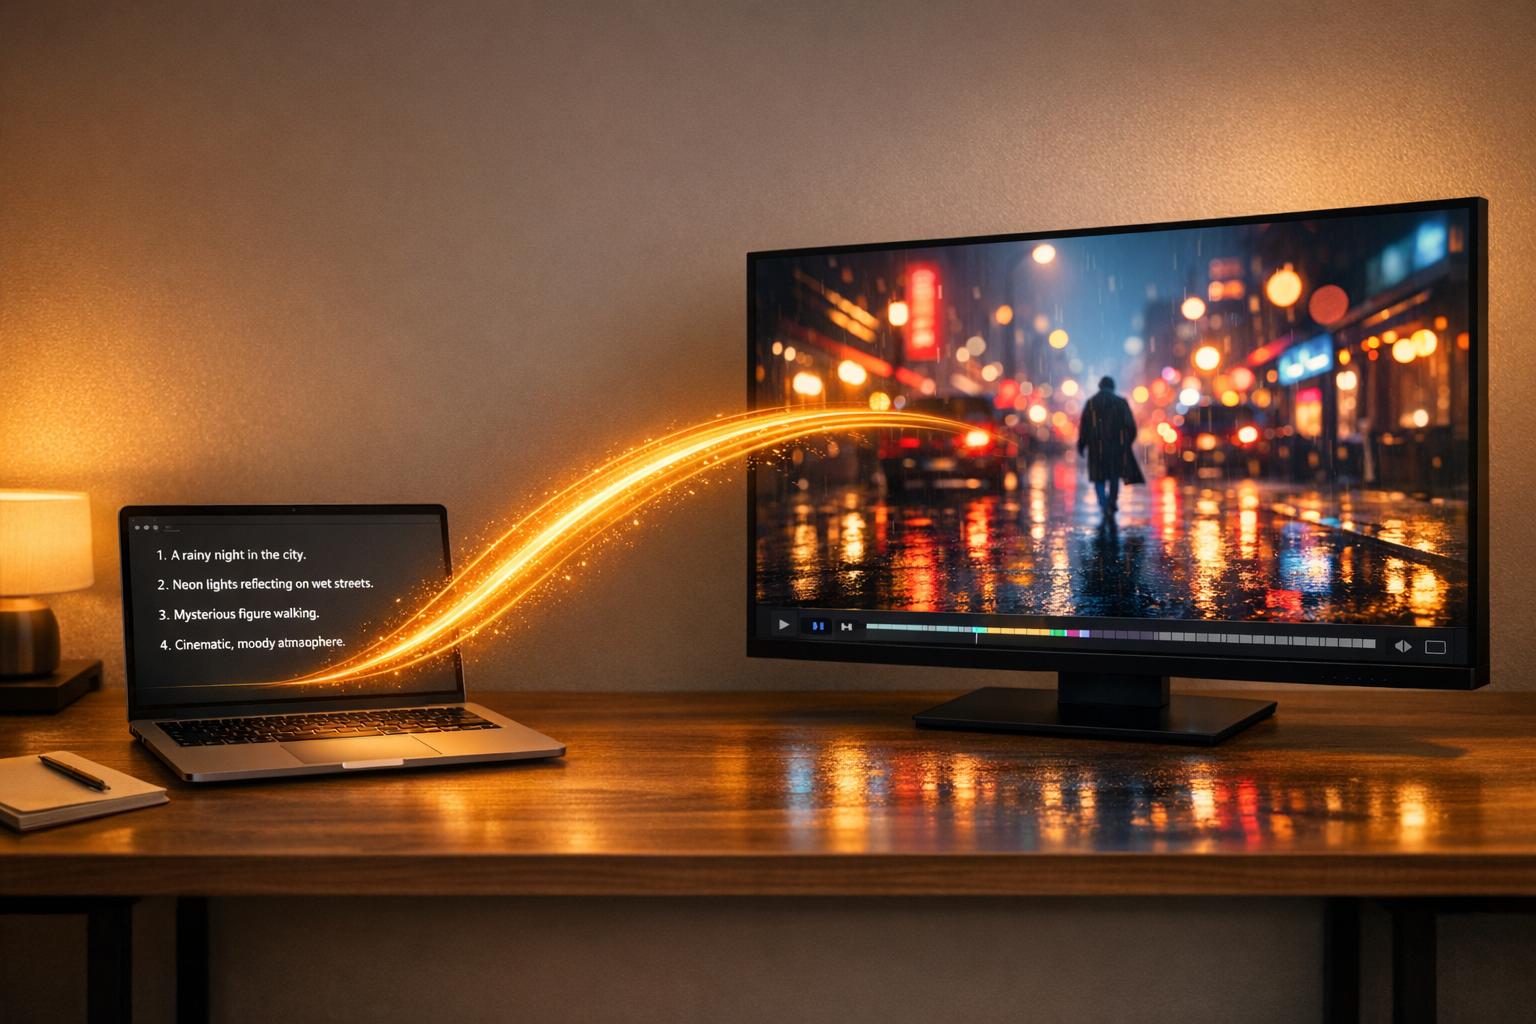
Creating professional videos used to be time-consuming and expensive. Now, Runway simplifies the process, letting you create stunning videos from text prompts in minutes - no filming, editing skills, or expensive equipment needed. Just describe a scene, and Runway's AI models, like Gen-4.5 and Gen-3 Alpha, generate smooth, high-quality visuals.
Here’s what you’ll learn:
- How Runway works: Turn text into 5-10 second video clips with options to extend or combine clips.
- Who it’s for: Perfect for creators, businesses, educators, and filmmakers needing quick, polished visuals.
- Step-by-step guidance: From setting up your workspace to writing effective prompts, tweaking camera angles, and refining outputs.
- Key features: Tools for camera control, fixed seeds for consistency, and built-in video editing.
Runway is an easy way to produce short, cinematic clips, whether you're making content for social media, marketing, or storytelling. Let’s break down how to get started and make the most of this tool.
Setting Up Your Runway Workspace
Creating Your Runway Account
Getting started with Runway is simple and quick. Head over to runwayml.com and click the sign-up button. You can register using either a valid email address or your Google account. The best part? You won’t need a credit card to access the Free tier.
Once you’ve signed up, your account will be credited with 125 one-time credits - enough to dive right into experimenting. For example, these credits can cover about 25 seconds of video using the Gen‑4 Turbo model or approximately 10 seconds with the standard Gen‑4 model. After logging in, you’ll land on the dashboard. The left-hand sidebar is your gateway to a range of AI models, including Gen‑4.5, Gen‑4, and Gen‑3 Alpha Turbo. You’ll also find specialized tools like Aleph, a built-in video editor, and Act‑Two for performance capture. Any videos you create will be saved in the "Assets" section under the "Sessions" folder. Before you dive into video generation, take a moment to set up your workspace.
Configuring Your Workspace
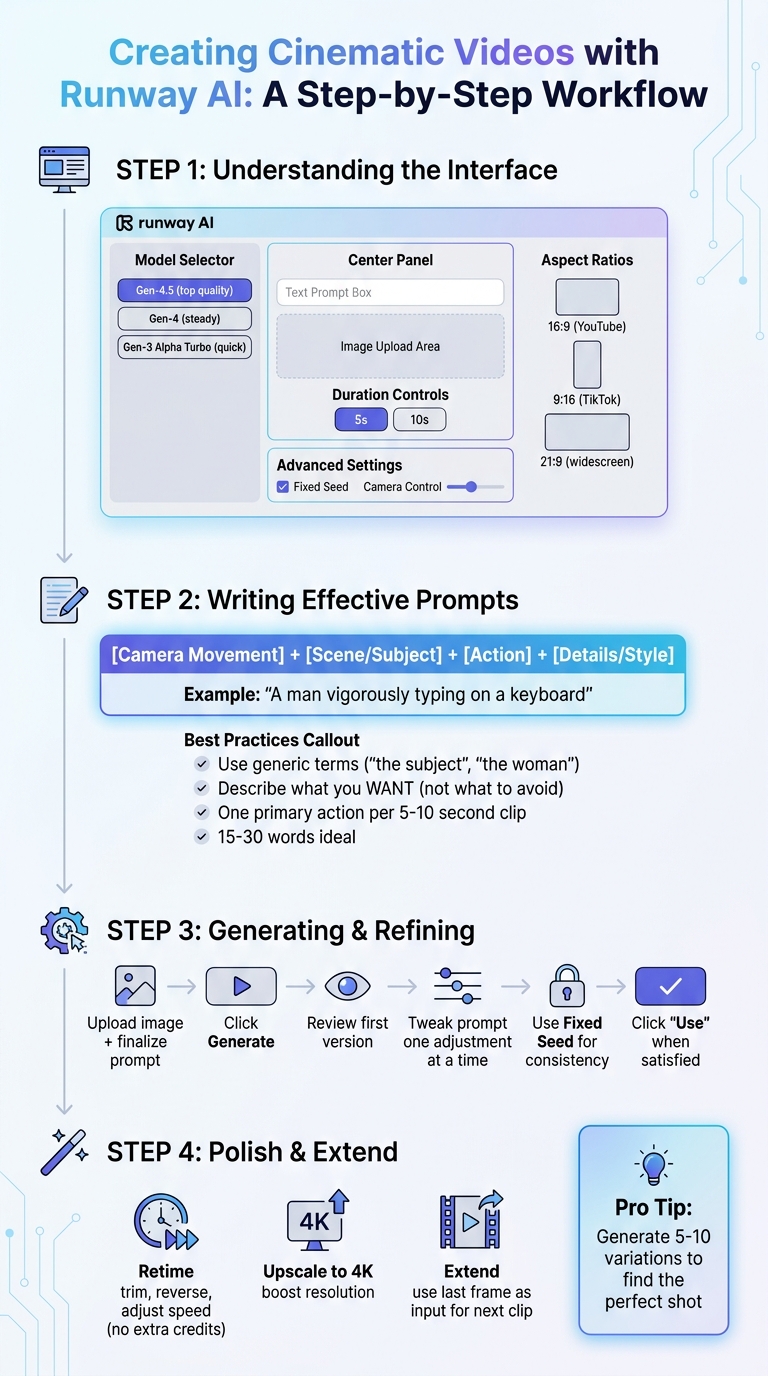
To prepare for your first video creation, adjust your workspace settings. Begin by clicking "Generate Video" from the dashboard, which takes you to the creation interface. At the bottom left, you’ll find the model selector. Opt for the Gen‑4 Turbo model - it uses fewer credits (5 credits per second) and speeds up the video generation process.
Next, choose the aspect ratio that suits your project. Options include 16:9 for YouTube or cinematic projects, 9:16 for TikTok or Instagram, and 21:9 for widescreen formats. Then, decide on the video duration - 5 or 10 seconds - ideal for creating smoother motion in complex scenes.
For consistency across clips, enable the "Fixed seed" slider and input a specific seed value. This ensures a uniform style throughout your project. With these settings in place, you’re ready to start generating your video.
sbb-itb-212c9ea
Runway AI Cinematic Video Generation FULL GUIDE | Beginner to Advanced Course
How to Create Cinematic Videos: Step-by-Step Process
Step-by-Step Guide to Creating Videos with Runway AI
Understanding the Video Generation Interface
Once your workspace is set up, click Generate Video on the dashboard to open the creation interface. The layout is intuitive. In the bottom left-hand corner, you’ll find the model selector, where you can choose between Gen-4.5 for top-tier quality, Gen-4 for steady results, or Gen-3 Alpha Turbo for quicker output.
The center panel is where the magic happens - it includes the text prompt box and an area for uploading images. If you’re using Gen-4 or Turbo models, uploading an input image is mandatory. This image helps establish the visual foundation, composition, and overall aesthetic. Below the prompt box, you’ll see controls for video duration (5 or 10 seconds) and aspect ratio options like 16:9 for YouTube, 9:16 for TikTok, or 21:9 for widescreen formats. For more control, expand the settings panel to access features like Fixed Seed (for consistent outputs) and Camera Control (to define movement direction). Once you’re ready, hit Generate. The video will appear in your session scroll and automatically save to your Assets folder. Now, let’s dive into crafting prompts that can guide your video creation process effectively.
Writing Effective Prompts for Better Results
The quality of your video hinges on how well you structure your prompt. A simple and effective format is: [Camera Movement] + [Scene/Subject] + [Action] + [Details/Style]. For example, instead of saying "a man hacking", try "a man vigorously typing on a keyboard" to give the AI clearer direction.
If you’re using an input image, focus your prompt on motion details and avoid describing elements already visible in the image. Use generic terms like "the subject", "the woman", or "the man" to keep the emphasis on movement. Also, steer your prompts toward what you want to see, rather than what you don’t. Julia Martins from Runway advises:
"Describe what you want to see, not what you want to avoid. Writing 'no camera shake' often produces shaky footage because the AI focuses on the word 'shake'."
Stick to one primary action per 5–10 second clip. Avoid overly complex sequences like "Woman walks to door, opens it, and sits down." For precise timing in Gen-4.5, you can use timestamp prompts. For instance: "[00:00 through 00:02] subject looks away, [00:02 through 00:04] subject turns to camera." With a clear and concise prompt, you’ll be ready to generate and refine your video.
Generating and Refining Your Videos
After uploading your image and finalizing your prompt, click Generate to bring your idea to life. The first version acts as a preview of the AI’s interpretation.
If something is missing, tweak your prompt using natural language. For instance, change "High angle" to "High angle looking down" for more specific guidance. Add adjustments one at a time - start with subject movement, then refine camera angles, and finally tweak the style. To maintain a consistent look across iterations, use the Fixed Seed setting.
When you’re satisfied with a clip, click "Use" to access refinement tools. The Retime feature lets you trim, reverse, or adjust speed without using extra credits, while Upscale to 4K boosts resolution for a polished, professional finish. To extend your video beyond 10 seconds, extract the last frame of your clip and use it as the input image for the next sequence. This step-by-step process ensures your cinematic vision comes to life seamlessly.
Using Advanced Features for Better Quality
Adding Camera Angles and Lighting Effects
Camera movement can turn static visuals into engaging, cinematic scenes. Runway provides two main ways to control camera angles: text-based prompts for models like Gen-4.5 and Gen-3 Alpha, and the Camera Control UI for Gen-3 Alpha Turbo. The Camera Control UI allows adjustments in six key directions - horizontal, vertical, pan, tilt, zoom, and roll - with values ranging from -10 to 10. Subtle movements are achieved with values between 0.1 and 1.0, while more dramatic shifts require values closer to 7.0 or 10.0.
To frame your scene effectively, start your prompts with specific camera instructions. For example, phrases like "Tracking shot following" or "Low angle looking up" can set the tone. Adding speed descriptors such as "slow", "gentle", or "steady" ensures smoother motion, while overly fast terms may introduce unwanted visual glitches. For a more natural feel, include easing phrases like "camera gently eases in", which mimic the smoothness of human-operated equipment.
Lighting also plays a key role in creating depth and atmosphere. Use terms like "side-lit", "back-lit", or "rim light" to define the form of your subject. Adding atmospheric details such as "dust motes floating in sunbeams", "morning fog", or "lens flare" can make the scene more immersive. For dynamic shots, keywords like "FPV fly through", "Dolly zoom", or "Crane up" can add cinematic flair. Keep in mind that Camera Control features require a Standard plan or higher, and using Gen-3 Alpha Turbo will cost 5 credits per second. Once you’ve set your camera angles and lighting, refine the scene further with keyframes and image references.
Working with Keyframes and Image References
Keyframes and image references allow for greater precision in timing and motion. By using an input image, you can establish the composition, lighting, and style, leaving your prompt to focus on movement and action.
For complex sequences, especially with Gen-4.5, you can use timestamped prompts to control the timing of specific actions. For instance:
- [00:01] X occurs.
- [00:03] Y occurs.
This format ensures that events unfold exactly as planned. Be sure your prompts align with the motion implied in the reference image - for example, avoid describing a still subject if the image includes motion blur. Input images should be at least 1080p and free of artifacts, as imperfections can become more noticeable when the scene is in motion. For shots requiring a stable background, enable the Static Camera option and reinforce it with phrases like "locked-off camera remains perfectly still."
Editing Your Videos with Built-in Tools
Once your prompts and keyframe adjustments are polished, you can extend video sequences seamlessly by using the final frame of one clip as the input for the next. This approach ensures smooth visual continuity. Start with simple motion prompts and gradually layer in details - first focusing on the subject’s movement, then adding camera dynamics, and finally fine-tuning the style. This step-by-step process helps you achieve polished, professional-quality videos with ease.
Tips for Professional-Quality Results
If you're aiming for polished, professional video results, these tips will help you refine your approach and enhance the final output.
How to Structure Your Prompts
Crafting effective prompts for cinematic results often boils down to a simple four-part formula: [Camera Movement] + [Scene] + [Action] + [Details]. For example: "Low angle tracking shot through misty forest. Figure in red coat walks away from camera."
Start with camera details to establish the visual framework - phrases like "Overhead crane shot" or "Smooth dolly shot" work well. Follow this with a description of the environment and the main action. Be specific, like "a man vigorously typing on a keyboard." For the best results, especially with Gen-4 and Gen-4.5 models, keep prompts focused on one primary action per 5–10 second clip.
Always phrase prompts positively. Instead of saying, "no camera shake", opt for "smooth, stable camera movement". This ensures the AI focuses on what you want rather than what to avoid. For sequences requiring precise timing, use timestamp prompting, such as [00:00 through 00:02] subject looks away, then turns towards camera. Keep prompts concise, ideally 15–30 words. When working with reference images, use general terms like "the subject" or "the woman" to keep the focus on motion rather than unnecessary reinterpretation of visual details.
Adjusting Settings for Better Output
The settings you choose have a direct impact on the quality and consistency of your video. Image-to-Video tends to produce more reliable results than Text-to-Video because it starts with a predefined composition, lighting, and subject. For the best output, use high-quality input images - at least 1080p resolution - and make sure they're free of visual imperfections, as flaws become more pronounced during animation.
Select an aspect ratio that matches your platform: 9:16 for TikTok and Instagram Reels, 16:9 for YouTube, or 1:1 for Instagram feed posts. Keep credit usage in mind - Gen-3 Alpha Turbo costs 5 credits per second, while Gen-4.5, which offers higher physical accuracy, costs 12 credits for every 5 seconds. Many creators generate 5–10 variations to find the perfect shot, so consider running multiple generations simultaneously to save time and compare results.
Once your settings are optimized, address any lingering issues with these strategies.
Fixing Common Problems
If your video isn't quite right, targeted adjustments can help fine-tune the output. For instance, if you notice unwanted cuts or scene changes, try extending the duration or adding "Continuous, seamless shot" to your prompt. If subjects or backgrounds lose detail - especially in clips longer than 5–10 seconds - simplify your prompt and focus on one main action. Start with a basic motion description, then gradually layer in details like lighting or style to pinpoint potential problem areas.
If your video lacks stability, inspect your input image for motion cues such as blur or dust clouds. These elements can confuse the AI, even if your prompt specifies a still shot. Use an image editor to remove these cues before generating. To further reduce unnecessary movement, include phrases like "locked-off camera" or "minimal subject motion" in your prompts.
"Think of prompting as a conversation with the model: You make a request, review the response, then clarify or expand your request based on what you see." - Runway Academy
For clips with visual issues like extra fingers or unnatural limb angles, avoid fast motion in your prompts. Instead, use descriptors like "slow", "weighted", or "at a natural pace" to guide the AI. Finally, remember that while AI can deliver up to 90% of the result, you can elevate your video further by using external tools for color grading and sound design.
Conclusion
Runway makes it possible to turn text into cinematic video. The key? Stick to the basics: use clear camera movements, define your scene, focus on specific actions, and include detailed elements to maintain consistency. A great starting point is the Image-to-Video tool, which offers reliability. Keep each clip focused on a single 5–10 second action, and don’t hesitate to create multiple variations to find that perfect shot.
Creating professional-quality videos takes time and experimentation. Many creators produce 5–10 variations before settling on the final clip - and that’s all part of the process.
"The fastest way to get faster is to start. Each iteration teaches you something that makes the next video quicker." – Julia Martins, Runway Resources
This iterative approach is perfect for crafting longer stories. Runway shines in generating natural settings, smooth camera transitions, and detailed product visuals. For extended narratives, you can combine several 5–10 second clips using the Aleph video editor built into the platform. Once your clips are stitched together, elevate your project with sound design and color grading - after all, sound accounts for 50% of the believability.
FAQs
Which Runway model should I use to start?
The Gen-4.5 model is ideal for text-to-video creation, delivering cutting-edge features and high-quality cinematic results. If you're looking for a more budget-friendly option, the Gen-3 Alpha model is a solid choice, offering a good balance of speed and quality while being available on standard plans. For top-tier results, the Gen-4.5 is the way to go.
How do I keep the same character and style across clips?
To keep your character's appearance consistent across various clips in Runway, upload a reference image of the character. This allows the AI to replicate the same look across different scenes and angles. By using reference images, you can maintain uniformity in your video project, even when scenes or actions change.
How can I make a video longer than 10 seconds?
To make a video longer than 10 seconds using Runway, you’ll need to generate several shorter clips - each around 5 to 10 seconds - and piece them together using video editing software. By generating clips sequentially based on your prompts, you can seamlessly combine them to create a longer, cohesive video. This approach allows you to build extended content and craft more detailed stories or films.